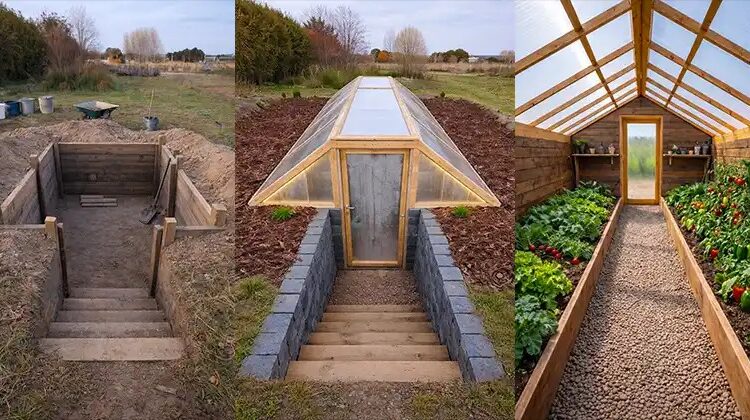
An underground greenhouse — commonly known as a walipini, a word meaning “place of warmth” in the Aymara language — is one of the most effective ways to grow food year-round by working with nature instead of against it. Rather than battling freezing winters, harsh winds, or extreme temperature swings, a walipini uses the earth itself as insulation.
By building below ground level, you take advantage of stable soil temperatures, reduced heat loss, and natural protection from weather extremes. Below is a practical breakdown of why walipinis work, where the design actually comes from, and how to build one step by step.
Where the Walipini Design Actually Comes From
It’s a common myth that the walipini is an ancient farming technique — many articles repeat this, but it isn’t quite accurate. While “walipini” is a genuine Aymara word, the design itself is a modern one: it was developed in the early 1990s near La Paz, Bolivia, by the Benson Agriculture and Food Institute (a Brigham Young University-affiliated group) as a low-cost way to help local farmers extend their growing season at high altitude. The concept does share similarities with much older ideas, like the sunken “pineapple pits” Victorian British gardeners used to grow exotic fruit, and underground citrus greenhouses used in pre-revolutionary Russia — but the walipini as it’s built today is roughly three decades old, not centuries.
That history matters for one practical reason: the original Bolivian design was engineered for La Paz’s specific latitude and sun angle. Builders in much colder or more northern climates need to adjust the roof pitch and depth for their own location rather than copying the Bolivian specifications directly.
Why Build an Underground Greenhouse?
Naturally stable temperatures. At depths of roughly 6-8 feet (1.8–2.5 m), soil temperature stays fairly constant year-round — commonly cited around 50-60°F (10-15°C) — regardless of what’s happening at the surface.
Reduced heating needs. Instead of a heater, a walipini relies on the surrounding soil as a thermal mass, absorbing heat during the day and releasing it slowly at night. In many climates, this removes the need for supplemental heat entirely.
Protection from wind and extreme weather. Being mostly underground shields the structure from high winds, hail, and heavy snow.
Extended growing season. In many regions, walipinis allow production close to 10-12 months a year, even where outdoor gardening is impossible for months at a time.
Improved water efficiency. Lower wind exposure and stable temperatures reduce evaporation, meaning less frequent watering.
Lower environmental footprint. Passive solar heating replaces fossil-fuel heating almost entirely.
How a Walipini Works
Three principles do all the work:
- Thermal mass — soil absorbs and stores heat.
- Solar gain — sunlight enters through a transparent roof.
- Insulation — underground walls limit heat loss.
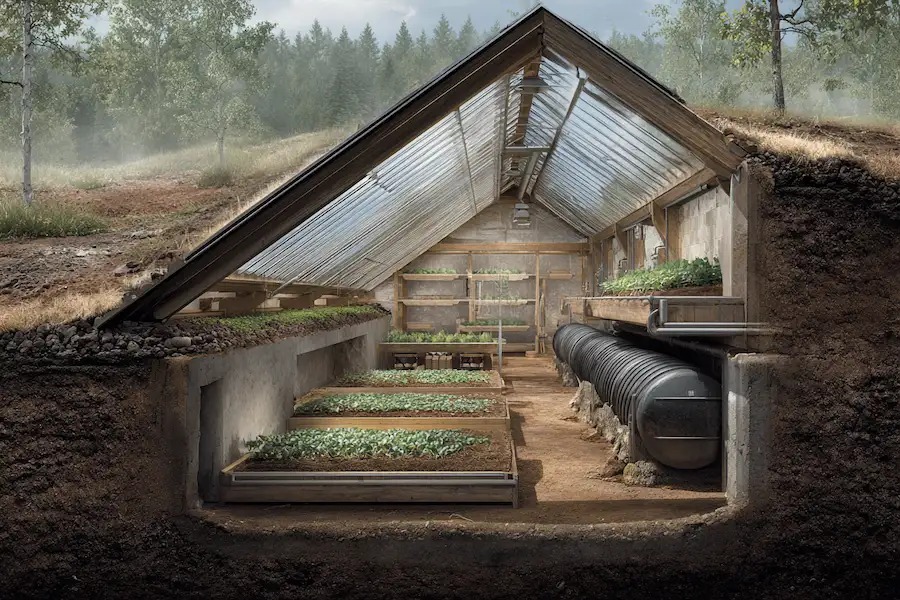
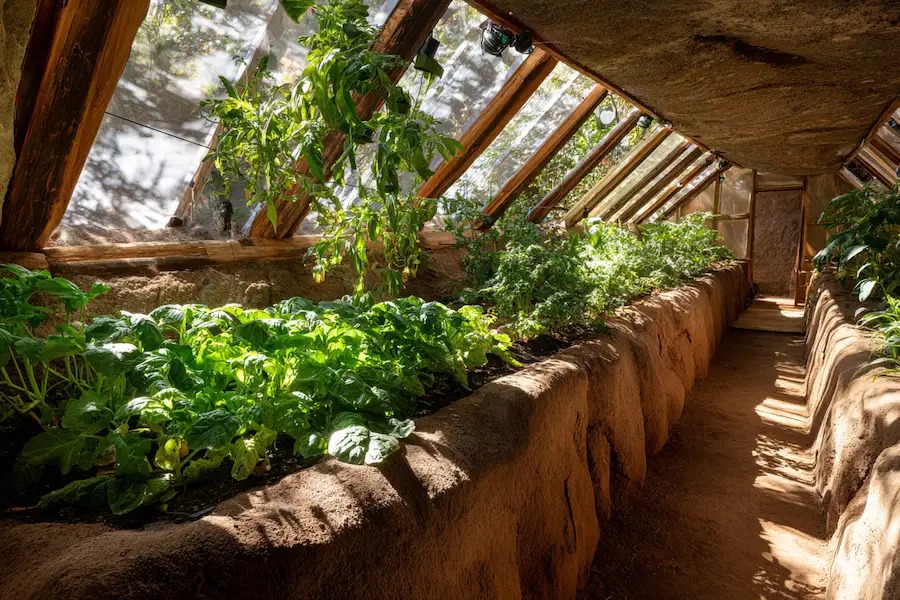
During the day, sunlight warms the interior and surrounding earth. At night, that stored heat radiates back out slowly, keeping plants protected even when it’s freezing outside.
Choosing the Right Location
- Well-drained soil (avoid flood-prone spots)
- South-facing exposure in the Northern Hemisphere, north-facing in the Southern Hemisphere
- Away from large trees and root systems
- A low water table — at least a few feet of clearance below the pit floor
- Reasonably close access to water
Core Design Principles
- Depth: Most walipinis are dug 6-8 feet (1.8–2.5 m) deep.
- Orientation: South-facing roof (Northern Hemisphere) or north-facing (Southern Hemisphere).
- Roof angle: Should be calculated for your specific latitude — a pitch designed for Bolivia’s sun angle will leave a walipini in much of the U.S. or Europe underlit for parts of winter. Online solar-angle calculators (using your latitude plus roughly 23.5°) can give a workable starting pitch.
- Shape: A long rectangle is easiest to build and manage.
Materials You’ll Need
Shovel or excavator, gravel, drainage pipe, concrete blocks/stone/earthbags/treated wood for walls, wooden beams or metal framing, greenhouse plastic or polycarbonate panels, stones or water-filled barrels for thermal mass, and ventilation pipes or windows.
Step-by-Step: Building a Walipini
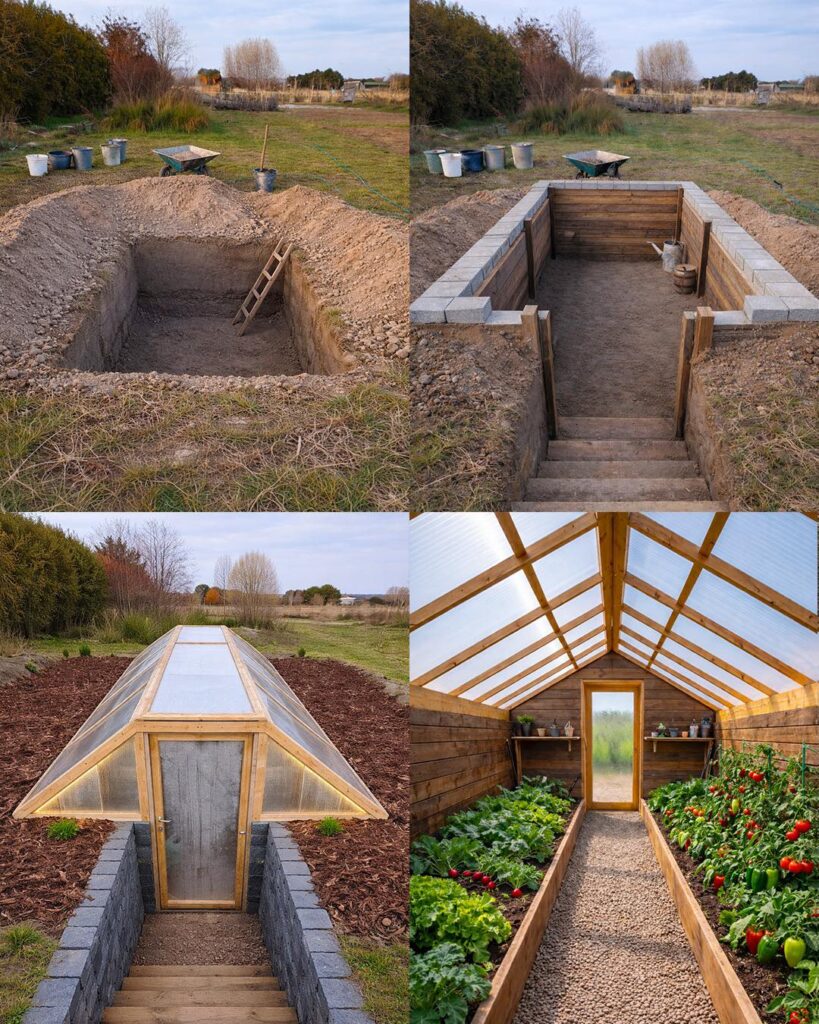
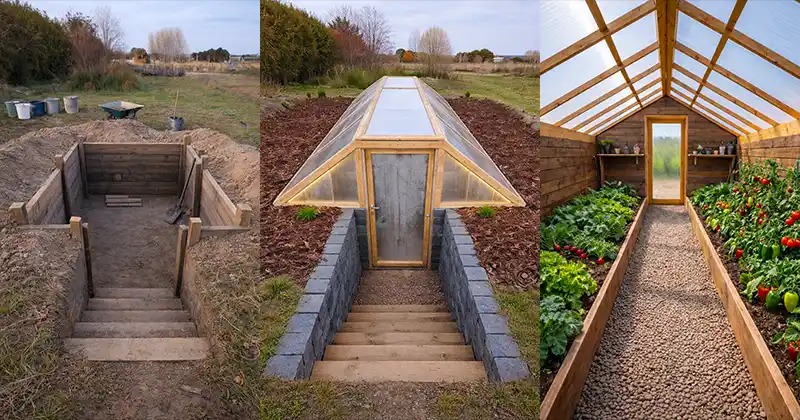
- Dig the pit — roughly 6-8 feet deep, 10-30 feet long, 8-12 feet wide, with the north wall built up higher to support the angled roof.
- Install drainage — a gravel base with a perforated pipe leading water away, to prevent standing water and root rot.
- Build the walls — concrete block, stone, or earthbags, built to resist soil pressure and moisture.
- Add thermal mass — stone, brick, or dark water barrels along the walls to store and release heat.
- Install the roof — wood or metal framing covered with greenhouse plastic or polycarbonate, all gaps sealed carefully.
- Add ventilation — one low intake vent and one high exhaust vent to prevent overheating and manage humidity.
- Build growing beds — raised or in-ground, amended with compost.
Best Crops for a Walipini
Leafy greens (lettuce, kale, spinach), herbs (basil, parsley, cilantro), tomatoes, peppers, cucumbers, green onions, strawberries, microgreens, and many root crops.
Common Mistakes to Avoid
Building in flood-prone areas, poor ventilation, weak wall reinforcement, a roof angle copied from a different latitude, no drainage system, and using untreated wood underground (it rots quickly in that moisture).
Cost Considerations
A basic walipini built with local materials and manual labor can be inexpensive, though real-world North American builds typically run higher than the often-quoted “$300 Bolivian” figure once permits, drainage, and reinforced walls are factored in — a more realistic range for a small structure is a few thousand dollars depending on materials and labor. More advanced versions with concrete walls and polycarbonate roofing cost more upfront but can last decades, with meaningful long-term energy savings compared to a heated surface greenhouse.
Frequently Asked Questions
Is a walipini an ancient design? No — despite the Aymara name, the modern walipini was developed in the early 1990s in Bolivia. It draws inspiration from older concepts like Victorian pineapple pits, but it’s a fairly recent design overall.
How deep does a walipini need to be? Most are dug 6 to 8 feet deep, where soil temperature stays relatively stable year-round.
Can a walipini work in a cold northern climate, not just Bolivia? Yes, but the roof angle and depth should be adjusted for your specific latitude — a design copied directly from the original Bolivian specs will underperform in much colder, more northern locations.
Does a walipini need any heating at all? Usually little to none in moderate climates. In very cold regions, supplemental insulation (like foam shutters over the glazing at night) can help during the coldest stretches.
Sources consulted: Insteading, Wikipedia (Walipini), the Benson Agriculture and Food Institute’s original Walipini Construction manual, and Biology Insights.
Leave a Reply